The under-sink photo shows how little room there is to work. The garbage disposal is on the left and the white canister on the right is a water filter. I used SharkBite Max fittings which do not require solder. My only worry was that the copper hot water supply line was pitted from the leak. SharkBite fittings need a smooth surface. I used a 3M stripping pad to clean the old pipe as best as I could. After that it was time to start cutting pipe. I used a Ridgid 40617 Model 101 close quarters tubing cutter to remove the old tee. The part that was soldered to the cold-water line was cut with a reciprocating saw. After deburring all of the cuts, the new SharkBite fittings were installed. I then installed clamps to give some support to the copper pipes. When I turned the water back on, I found only one leak where the dishwasher line connects to the shutoff valve. It just needed to be tightened a bit more. The pipe repair took about 4 hours.
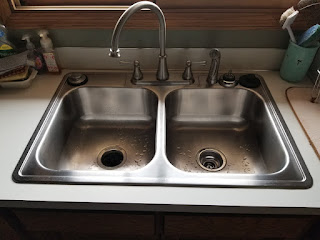
Several weeks later, with the under-sink repairs completed, it was time to remove the old sink. I first disconnected the water lines to the faucet and then removed the garbage disposal. This gave me room to get at the 6 clamps that hold the sink in place. With the clamps removed I was able to lift the sink out. I then moved the faucet and the garbage disposal mounting hardware to the new sink. Everything was going well until I tried to remove the drain from the right side of the old sink. I tried using an adjustable plumber's wrench, but that didn't work. As a last resort I tried my 12" pipe wrench. That made the whole drain rotate, but the nut would not budge. I gave up and went to Lowes and bought a new drain assembly for $22.With both drains in place and the faucet mounted I was ready to install the new sink. The 2-inch deeper sink bowls made reinstalling the clamps a little difficult. I had to cut about an inch off the plastic drainpipe on the right side. The garbage disposal was heavy, but I managed to get it mounted. The drainpipe on the left side had just enough adjustment to line up with the garbage disposal. I then connected the water lines to the faucet. No leaks! The last step was to put silicone caulk around the outside of the sink. The removal and installation took about 8 hours. Total project cost was about $180. It doesn't look much different, but it is nice to get rid of the dull finish and the dent between the bowls.Technology reviews, ideas for saving money, and insightful thoughts on modern society.
Thursday, June 12, 2025
Kitchen Sink Project Finished
It took several months before I was ready to install the Ebay kitchen sink that I refurbished. I first needed to fix a leak in the hot water line that goes to the dishwasher. I also needed to replace the shutoff valve on that line. Because the leak was right at the tee that goes to the dishwasher, I needed a new tee in addition to the shut off valve. I noticed that the copper pipe for the hot water was soldered to the cold-water line. I figured this was done to give the pipes some support. I decided to reroute the hot water line for the dishwasher to the back wall and put in a 90-degree elbow. I also needed about 10 inches of copper pipe and some 1/2" pipe clamps to secure the pipe to the back wall.
Subscribe to:
Post Comments (Atom)


No comments:
Post a Comment